background

Monday, November 21, 2011

How to Add a Crochet Border to a Quilt (For Experienced Crocheters)

I decided to add a crochet border to minky one day and came up with this.


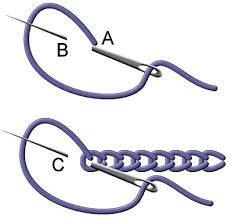
It is actually really easy to add a crochet border too.  I thought of two ways to do so. First you could add swiss entredeux (pictured here) baby entredeux in between the layers and cut off one of the fabric sides on the entredeux then use the holes as your initial chain stitch.  Or you can do what I did on this blacket and use a large enough eyed needle to hand stitch with your color yarn around the border with a chain stitch (pictured here)   .  I made sure I went along the top of the edge and tried to keep the stitches equal in number and size on opposite sides.  These chain stitches were used as if they were my initial chains I would have made if I was only hand crocheting.    I hope this encourages some new ideas.
Enjoy,
Barbara

Monday, November 14, 2011

Crochet Booties by The Lovely Crow

Now I have a lot of crochet patterns and have purchased lots as well but I must say The Lovely Crow has the best support and customer service ever.  She has videos to help with her patterns and strongly incourages you to contact her if you need any help. I can tell she takes great pride in her patterns and loves what she does and truely wants you to be successful at the art of crocheting though her patterns.  I can tell all this without ever even meeting her or talking with her.  The patterns and support say it all.  I truely enjoyed making these little rainboots for my shop and shows. If only I could figure out how to become a tester for wonderful designers such as The Lovely Crow then I would be set.  I hope you will enjoy making these for your little ones too.


Enjoy
Barbara

Monday, November 7, 2011

The Cutest Summer Sandals Ever

I was browsing on Etsy (I know what a concept) and I came across this great pattern from Two Girls Patterns . Simply Summer Sandals it was called and I just knew my little girl had to have a pair made by me.


Of course it doesn't hurt that I can sell them in my shop and at fairs either (Up To My Knees In Crafts if you are interested).  I have to say though the patterns are very well made too. Easy to understand and great pictures help me to rave about this pattern. It is always nice to see a great idea with well made instructions.  So if you are a baby crochetaholic I have to say this is a must have pattern. 
How to add the beads are not included in the pattern that was just a little something I had to add for a special touch, set me apart so to speak. 
Enjoy,
Barbara

Monday, October 24, 2011

Tutu's Made Easier

Tied tutus are so easy to make and great for the holidays. Using these crochet headbands make it even easier.
 Item image
Use them instead of elastic when working for girls with chest or waist sizes 24in or smaller.  It allows for you to not have the rough feel of the tulle on your little ones body. It also makes a prefect top band to a tutu dress. It is easy to tie the tulle to the sections of the crochet headband as shown. 


Add some flowers and other beautiful things and you can have this:


or


Monday, October 17, 2011

Halloween outfits

I made these four Halloween outfits for a craft fair that may I say was a total flop for me.  But atleast I broke even in the cost of the fair to sales.  So sad.  I put these in my shop on etsy to try and sell before Halloween. I am kind-of hoping the smallest one will stay so I can just have my daughter wear it b/c I love them.


I added cute decorative stitches to each layer.


Tuesday, October 11, 2011

My First Boutique Order

Right before I moved into our new house I got an order from Amber at Buttercup Boutique in Dickson, TN (http://buttercupdickson.com/fashion-shoot/ ).
This picture is from her web-site promoting her new little boutique. 
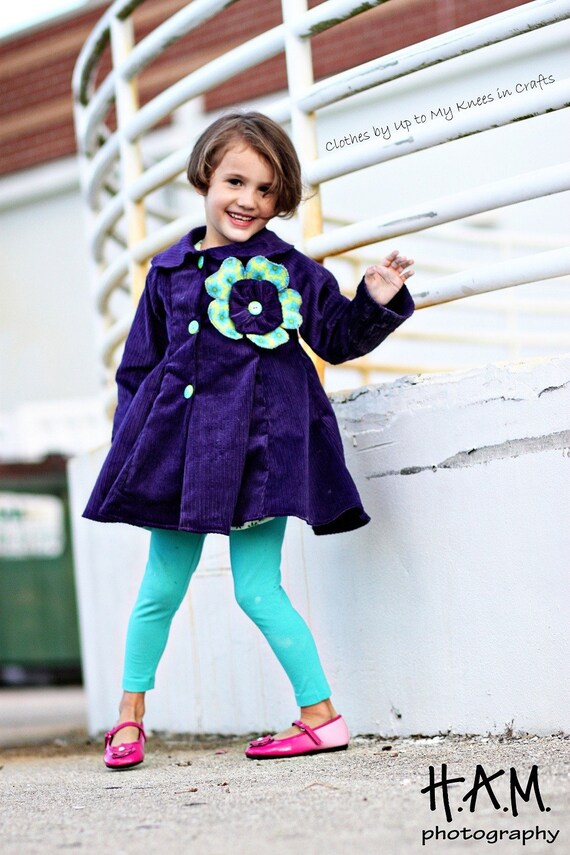
Anyway I felt horrible for the delay moving caused in her order but hopefully she can overlook that when she sees how cute her jackets came out. I love them.  I added a lining to my already popular jacket
Corduroy Jacket with Flower Size 3,4,5,6,7 or 8
http://www.etsy.com/listing/55088871/corduroy-jacket-with-flower-size-34567. And here they are Now I have to say before hand the picture taking part is not my area that is why I have others do it for me. But I have to have some flaw and I more then make up for it in my skills sewing. 


I had these embroidery designs for the flowers from Design By Juju -http://www.designsbyjuju.com/products/dbjj417.aspx . I just put a layer of corduroy on the bottom, stiffen felt in the middle and the fabric on top and cut the flowers out using applique scissors and hand sewed them on. 


For these beautiful pinwheel flowers I used Kari Me Aways design and tools ( http://www.karimeaway.com/products/846 )

Enjoy,
Barbara

Tuesday, October 4, 2011

In My Corner (Also on Team Fest Blog)

Hi everyone. I am Barbara from Up To My Knees in Crafts and I figured since I did this article for my team blog I could use it to start off my rededication  to my blog.


Since we just moved into our new house my space is much neater then it would be during (I was going to say the holidays but lets face it) any other time. My creative area takes up what would have been a kitchen nook in a home that didn’t have a crafter in it.
I took over the computer desk for my sewing machines for two reasons. 1. I can’t afford the $2,500 sewing desk I really want yet. 2. I have a wonderful almost 3 year old boy who thinks my machines are the best toys in the world (not so good for business). The roll down top locks it was perfect, too bad our computer now occupies a linen table top. All well, sacrifices had to be made.


I started with quilts and then went to Joann’s and got a pattern. And now I have….well you can see…. tons of patterns and books. Most of my inspiration comes from the magazine Sew Beautiful. I love it but it gives me way too many projects to want to do. Now I have a list that looks like something Santa checks off but I keep it in this notebook oh and these binders….


Well you get the picture.

So my first thought when asked what the one thing I can not live without is was my sewing machines. A no brainer I know (I mean I do lock them up).

But as a sewer a seam ripper is a close second as well as a little stash of candy. Don’t worry no fabric is harmed during my secret binges.


So, not all my craft stuff actually fits into this nook so I had to take over a closet in my daughter’s bedroom.

Again a sacrifice a family member makes to feed the addiction of another (me but at least I squeezed it in so that it was only one closet).

There are a few things missing from my space (like décor but they will go up soon) but I would like to share one last thing and that is a little storage tip. Pictured here is an odd and ends storage container that I got from home depot. It didn’t cost much (maybe $15) and it is perfect for all the buttons, brads and other little items that I use for projects. By no means is it a thing of beauty but as my décor goes up I believe this baby can be painted and/or covered with paper and will fit just fine.


I also had a craft table which sits quietly behind the bookcase:

To be brought out when needed for cutting out patterns:


Oh and I can’t go without including my most precious processions in my corner.


My daughter who likes to play around me as I sew or my son who likes to help.

Enjoy,

Barbara